
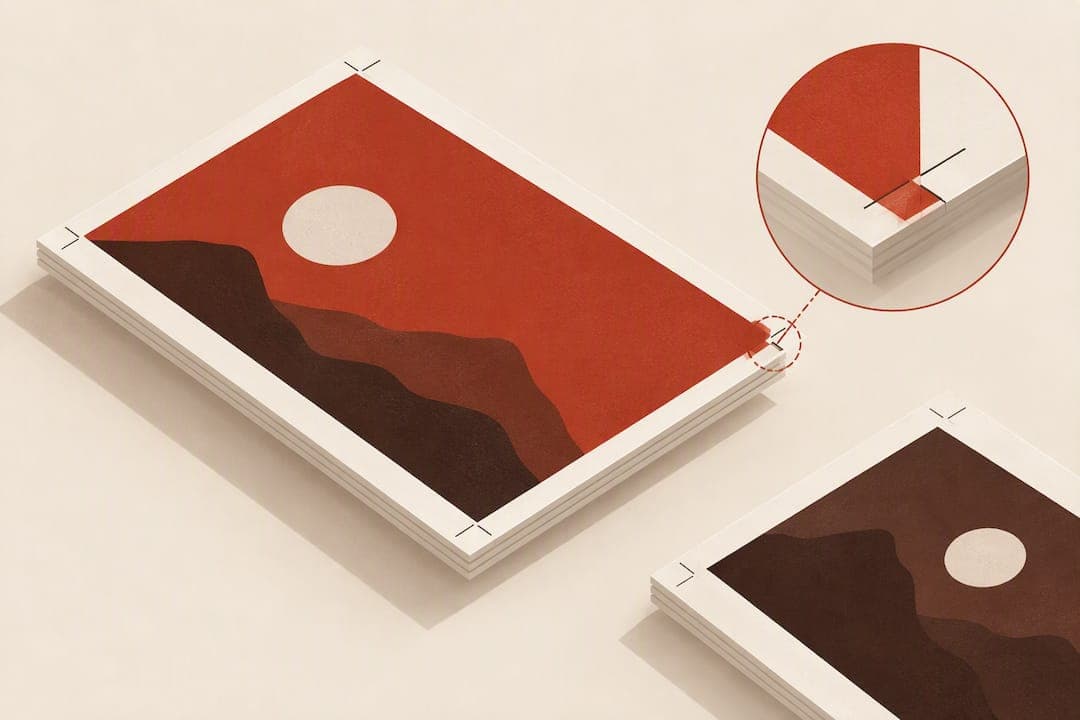
Set your trim size, set margins and gutter for your page count, add bleed only if images reach the edge, embed every font, export as PDF/X, run a preflight check, then upload. That sequence covers the formatting that Amazon KDP checks on every file, and it applies to most print on demand platforms with small variations. Skip ahead to images and bleed, chapter templates, preflight, or upload fixes depending on where your manuscript stands right now.
Key Takeaways
Proper formatting with correct trim size, bleed, margins, font embedding, and preflight checks ensures a smooth print-on-demand setup for KDP or similar platforms.
| Point | Details |
|---|---|
| Choose correct trim size | Select a trim size from KDP's table to control page count, shipping weight, and printing costs. |
| Set margins and gutter early | Decide on margins before formatting chapters to prevent layout issues as your manuscript length changes. |
| Prepare pages with bleed and images correctly | Extend images 0.125 inches beyond trim edges and keep vital content inside the safe zone for proper printing. |
| Use a manuscript template for consistency | Apply KDP’s or platform-specific templates to maintain uniform styles, headers, and numbering across all chapters. |
| Utilize Alhora for automated validation | Alhora runs live checks for trim, margins, bleed, font embedding, and produces print-ready PDFs, saving time and reducing errors. |
Table of Contents
- Choose and Set Trim Size, Page Dimensions, and Margins
- Bleed, Images, and Color: Prepare Pages That Reach the Edge
- Set Up a Manuscript Template and Import Chapters
- Pagination, Front Matter, and Page-Numbering Rules
- Fonts, PDF Export Settings, and Preflight Checks to Avoid Rejection
- Upload to Print Previewer and Fix the Most Common Formatting Errors
- How a Dedicated Typesetting Workflow Maps to These Steps
- When to Format It Yourself vs. Use a Dedicated Tool
- Alhora: Format Your Interior and Export a KDP-Ready File Today
- FAQ
- Sources
Choose and Set Trim Size, Page Dimensions, and Margins
Trim size is the first decision because it determines page count, shipping weight, and printing cost before you touch a single margin setting. A 5" x 8" novel will run more pages than the same manuscript at 6" x 9", and page count drives both your spine width and your print cost per unit. Most fiction uses 5.5" x 8.5" or 6" x 9"; nonfiction with images often goes larger, at 7" x 10" or 8.5" x 11".
Margins have to account for the gutter, the inside margin where the page meets the binding. The gutter grows as your book gets thicker because more pages curve into the spine. KDP's trim and margin guidance sets minimum outside, top, and bottom margins at 0.25 inches for interiors without bleed and 0.375 inches for interiors with bleed, and inside gutter minimums increase with page count rather than staying fixed.

If your interior needs bleed anywhere, your page dimensions change. The formula is simple: take your trim size and add 0.125 inches to the outer edges where images extend past the trim line, per KDP's bleed specifications. A 6" x 9" trim with bleed becomes a page sized at 6.125" x 9.25" before export, which is the dimension your word processor or layout tool needs to use, not the final trimmed size.
A few practical rules keep this stage from becoming a guessing game:
- Pick a trim size from KDP's published table rather than inventing a custom size, since nonstandard dimensions can trigger manual review delays.
- Decide on bleed before you format a single chapter, because changing page dimensions after the fact means re-checking every image and margin.
- Check your gutter minimum again once your manuscript is close to final length, since page count shifts during editing and the gutter requirement shifts with it.
- Use our KDP margin requirements guide if you want the exact minimums broken out by page-count range.
Nonstandard trim sizes exist for art books, workbooks, and journals, but confirm compatibility against KDP's trim-size table before committing, since not every size is available for every binding type or distribution channel.
Bleed, Images, and Color: Prepare Pages That Reach the Edge
Bleed only matters if something on your page extends to the edge of the trimmed book: a full-page photo, a colored chapter-opener background, a graphic that touches the margin. If no page does that, skip bleed entirely and use the no-bleed margin minimums. KDP requires bleed to extend 0.125 inches (3.2 mm) beyond the trim line, and that number doesn't change by trim size or genre.
One detail catches authors off guard: if even one page in your manuscript needs bleed, the entire interior file has to be formatted with bleed dimensions. You can't mix bleed and non-bleed pages in a single upload. That means deciding on bleed early, before you've laid out two hundred pages at the wrong size.
Image requirements are separate from bleed but just as strict. KDP expects images at 300 DPI at their final printed size, in either grayscale or CMYK color depending on your interior type, with transparencies flattened before export. An image that looks sharp on screen at 72 DPI will print blurry or pixelated, since screen resolution and print resolution aren't the same measurement.
To prepare a bleed image correctly:
- Extend the image at least 0.125 inches past the trim edge on every side that touches the page boundary.
- Keep text and important visual elements inside the safe zone, roughly 0.25 inches inside the trim line, so nothing gets cut during trimming.
- Save the final layout as a PDF at the bleed-adjusted page size, not the trim size, confirming resolution and color mode before export.
Pro Tip: Open your exported PDF at 100% zoom and check corners and edges for stray crop marks or a creation-software watermark. Both are common causes of rejected files, and both are easy to miss at a glance.
Our guide to exact KDP bleed settings walks through page sizes for every standard trim if you want the numbers worked out for your specific book.
Set Up a Manuscript Template and Import Chapters
A template keeps your formatting consistent across every chapter instead of rebuilding styles page by page. KDP publishes its own paperback templates, and Word and Pages both accept them directly, giving you pre-set margins, headers, and paragraph styles matched to your chosen trim size.
Here's the sequence that produces a stable, predictable file:
- Download the KDP template for your trim size and open it in Word or Pages rather than starting from a blank document.
- Paste your manuscript text in as unformatted text first, which strips out inconsistent fonts, spacing, and leftover formatting from earlier drafts.
- Apply the template's built-in paragraph styles (Body Text, Chapter Title, Section Break) to every paragraph instead of manually adjusting font size or spacing.
- Insert a section break at the start of each chapter rather than a simple page break, since section breaks let you control headers and page numbering independently later.
- Add scene breaks using a consistent symbol or spacing, never an empty paragraph with several returns, which can create invisible characters that shift pagination during export.
- Apply drop caps or chapter-opener styling through the template's built-in style, not manual formatting, so the look stays consistent if you adjust trim size later.
- Place images directly in the text flow at their intended position, confirming each one sits inside the safe zone before moving to the next chapter.
Before exporting anything, run through a short checklist: confirm every chapter uses the template's heading style rather than manually bolded text, remove any placeholder text left over from the template itself, check that line spacing is consistent from chapter to chapter, and verify every image displays at full resolution rather than a low-resolution placeholder. Authors who skip this checklist tend to discover inconsistent spacing or a stray placeholder paragraph only after the Print Previewer flags it, which costs a re-export and a new upload.
Our paperback formatting walkthrough covers the same sequence with platform-specific notes if your book is also going to IngramSpark or another POD platform with its own template requirements.
Pagination, Front Matter, and Page-Numbering Rules
Front matter follows a standard order: title page, copyright page, dedication, table of contents, then the body of the book. Front matter pages traditionally use lowercase roman numerals, while the main body switches to Arabic numbers starting at page 1 with the first chapter or prologue.
That switch requires a section break between your front matter and your first chapter, not just a page break. A section break lets you set a different header and footer style for each section independently, so your title page doesn't carry a page number and your table of contents doesn't inherit the chapter header from page 50.
A few conventions to follow:
- Place page numbers on the outside edge of each page (bottom-right on right-hand pages, bottom-left on left-hand pages) for the traditional book layout.
- Keep headers off the first page of every chapter, since a chapter opener with a running header above the title looks unfinished.
- Confirm your total page count supports spine text, since KDP requires a minimum of 79 pages before spine text can appear at all.
- Check that your file uses single pages rather than spreads, since KDP's submission guidelines require single-page files, not two-page spreads saved as one image.
Before export, scroll through the whole manuscript once just to check numbering sequence: no skipped numbers, no numbering that restarts unexpectedly, and no header text bleeding into a section where it doesn't belong. This single pass catches most pagination errors before they reach the Print Previewer.
Fonts, PDF Export Settings, and Preflight Checks to Avoid Rejection
Font embedding causes more upload rejections than almost any other single issue, because an unembedded font displays correctly on your screen but prints as a substitute font, or not at all, on someone else's system. KDP's file guidelines require every font embedded in the exported PDF, and the word processor's "Save as PDF" function doesn't always do this reliably.
To verify embedding, open your exported PDF in Adobe Acrobat and check File then Properties then Fonts. Every font listed should show as "Embedded" or "Embedded Subset." If a font shows without either label, practitioner guidance recommends re-exporting from the original document with font embedding explicitly enabled, rather than trying to patch the existing PDF.
A single unembedded font can cause an entire manuscript to render with the wrong typeface on a different system, according to KDP's own file guidelines, which is why embedding is checked before any other formatting detail during review.
Beyond fonts, KDP's export recommendations cover several settings worth locking in before you ever click export:
- Choose PDF/X-1a as your export format when your software offers it, since KDP lists this as its preferred format for print-ready files.
- Disable any downsampling option in your export settings, which would otherwise reduce image resolution below the 300 DPI requirement.
- Flatten all transparencies before export, since unflattened layers can shift appearance between what you see on screen and what prints.
- Remove crop marks, comments, and any creation-software watermark from the final PDF, none of which belong in a print-ready file.
Run a preflight check on the finished PDF before upload rather than relying on the platform's review to catch everything. A preflight pass means opening the file at full size, confirming fonts show as embedded, checking that image resolution holds at 300 DPI, and confirming no stray marks or invisible objects remain from the export process. Our PDF preflight checklist for books walks through each of these checks in sequence if you want a repeatable process for every title.
Upload to Print Previewer and Fix the Most Common Formatting Errors
KDP's Print Previewer runs an automated check the moment you upload, flagging issues before a human reviewer ever looks at the file. KDP's own guidance on fixing formatting issues confirms the Previewer can catch margin and bleed problems, font issues, and resolution problems automatically, with a manual review following for anything the automated check doesn't resolve.
When the Previewer flags an error, the fix is almost always specific to the error type rather than a full re-format:
- Margin or bleed warnings usually mean an image or text block crosses into the safe zone or falls short of the bleed extension. Re-check the page against your bleed-adjusted dimensions and adjust the offending element only.
- Font errors point back to embedding. Re-open the source document, confirm embedding is enabled in the export settings, and re-export rather than editing the existing PDF directly.
- Image resolution warnings mean an image falls below 300 DPI at its printed size. Replace the image with a higher-resolution version or reduce its printed size to match the resolution you have.
- Pagination problems, like a missing page or an unexpected blank page, usually trace back to a section break placed incorrectly during the template stage. Check the section breaks around the flagged page number first.
After fixing an issue, save the corrected file as a new version rather than overwriting your original. Keeping a dated version history means you can always step back to a working file if a fix introduces a new problem elsewhere. Run your preflight checklist again on the corrected file before re-uploading, since a fix to one page can sometimes shift pagination or margins on pages around it.
Pro Tip: If the Previewer flags the same error twice after a fix, open the PDF in a separate reader outside your original layout software. Some layout tools cache an old export and show you a preview that doesn't match the file you actually uploaded.
For anything the automated Previewer and manual review both miss, like a layout that technically passes every check but still doesn't look right in the live preview, an extra offline validation pass before you commit to final publication catches what automated checks structurally can't see.
How a Dedicated Typesetting Workflow Maps to These Steps
Every step above, trim size, margins, bleed, font embedding, PDF export, is a manual check we built a faster path through with Alhora. Our typesetting engine runs live validation as you format, rather than waiting until export to tell you something's wrong.
Here's how the workflow lines up with what we've covered:
- Choosing a trim size inside Alhora applies the correct margin and gutter minimums automatically, adjusting as your page count changes during editing.
- Turning on bleed for an image-heavy chapter resizes the page dimensions to the bleed-adjusted size across the whole interior, so you never end up with mismatched pages.
- Font embedding occurs at export, so no separate verification step in Acrobat is necessarily required.
- Our PDF export is designed to produce print-ready files meeting common platform specifications without requiring a separate settings checklist.
A typical workflow inside Alhora looks like this: import your manuscript, choose your trim size from the built-in library, watch live validation flag any margin or bleed issue as you format each chapter, then export directly to a KDP-ready PDF/X file. The validation happens continuously, not as a final check after the fact, which is the difference between catching an error while you're still working and discovering it after an upload rejection.
Our built-in AI assistant, Inkia, flags formatting issues as you work but never writes or alters your manuscript's actual content, keeping creative control with you while handling the technical verification in the background. For authors publishing a series, batch formatting carries the same trim, margin, and style settings across every volume, so book four doesn't drift from book one's layout. Our KDP book formatting page covers the export workflow in more detail if you want to see it against a specific trim size.
When to Format It Yourself vs. Use a Dedicated Tool
A short manuscript with no images and a single standard trim size is a reasonable DIY project if you're comfortable checking margins, embedding fonts, and reading a PDF preflight report. The steps aren't complicated individually. What makes formatting time-consuming is the number of small checks stacking up across two hundred or more pages, each one easy to miss once.
Complexity changes the calculation fast. A full-color interior with bleed on every page, a multi-volume series that needs identical styling across every book, or a tight publication timeline all raise the cost of a missed font-embedding error or a margin that's 0.05 inches short. One rejected upload on a tight deadline costs more time than the formatting would have taken with a tool that validates as you go.
The honest tell isn't genre or page count. It's whether you're confident reading a PDF export settings dialog and knowing what each option does. If disabling downsampling or choosing PDF/X-1a sounds unfamiliar rather than routine, a dedicated formatting workflow removes that uncertainty rather than asking you to learn it under deadline pressure. Series authors in particular benefit from a tool that carries style decisions forward automatically, since manually matching five books' worth of margins and chapter styles by hand invites small inconsistencies that readers notice even when they can't name what's off.
— James
Alhora: Format Your Interior and Export a KDP-Ready File Today
The steps in this guide, trim size, margins, bleed, font embedding, PDF/X export, and preflight, all happen inside Alhora as you format, not as a separate checklist you run after the fact. That's the real time savings: catching a margin or embedding issue while you're still writing chapter twelve instead of after an upload rejection on publication day.
Our typesetting engine runs on Mac, Windows, Linux, and ChromeOS, so your workflow doesn't depend on which machine you own. A few specifics worth knowing before you start:
- Live validation checks trim, margins, bleed, and gutter as you format each chapter, not only at export.
- Export produces a PDF/X file built to KDP's specifications, with fonts embedded automatically.
- Batch formatting carries consistent styling across every book in a series, so later volumes match the first.
- A proof of authorship travels with your file, supporting that the manuscript is your own work.
A single Alhora license costs £99 one-off per user, with no recurring subscription required for that license. If you're deciding between platforms, our book formatting software comparison walks through what to look for before you commit.
FAQ
What is the best program to format a book?
The right program depends on whether you need basic text layout or full print and ebook export with live validation against platform specifications. Word and Pages both work for simple interiors using KDP's templates, while a dedicated typesetting tool like Alhora adds automatic trim, margin, bleed, and font-embedding checks as you format.
Which websites offer print on demand services?
Amazon KDP and IngramSpark are the two most widely used print on demand platforms for independent authors, each with its own trim size tables, margin minimums, and file requirements. KDP's own help pages detail its specific bleed and margin rules, which differ slightly from IngramSpark's requirements.
What is an example of format?
In book formatting, a format refers to the combination of trim size, margins, font embedding, and page layout settings that match a specific printer's requirements. A 6" x 9" paperback with 0.375 inch margins, embedded fonts, and a PDF/X-1a export is one example of a complete, KDP-ready format.
How do I prepare a book for Kindle?
Preparing an ebook for Kindle involves a different file format than print, typically EPUB rather than a print-ready PDF, since Kindle reflows text rather than fixing it to a printed page. Print formatting steps like trim size, bleed, and margins don't apply to Kindle files, though consistent paragraph and heading styles still carry over from your manuscript.
How do I know if my PDF will pass KDP's Print Previewer?
Running a preflight check before upload, confirming embedded fonts, correct bleed dimensions, and 300 DPI images, catches most issues the Print Previewer would otherwise flag. The Previewer still runs its own automated check plus a manual review, so a clean preflight pass improves your odds without guaranteeing approval on the first upload.