
A print-ready book PDF must confirm several key things before upload: trim dimensions match the printer's spec, bleed extends beyond all live edges, all fonts are embedded, images have sufficient resolution, and the color profile is CMYK (or matches the printer's explicit requirement). Run those five checks and you will catch the errors that cause automatic rejections on KDP, IngramSpark, and most offset printers.
Quick preflight checklist — run this now:
- Trim size: PDF page dimensions equal the target trim (e.g., 6" × 9")
- Bleed: a small bleed area on all edges with live content (covers always; interiors when images or backgrounds touch the edge)
- Fonts: all fonts embedded and not subset-locked
- Images: 300 PPI minimum at final print size
- Color: CMYK or PDF/X-compliant profile, no unintended RGB or spot colors
If all five pass, the file is ready to upload. If any fail, re-export from the source layout — do not patch a flattened PDF.
Key Takeaways
Running PDF preflight for books on the final exported file — not the source document — and fixing geometry errors before fonts and color catches the majority of print rejections before they happen.
| Point | Details |
|---|---|
| Geometry first | Check trim dimensions, bleed, and spine width before fonts or color to reduce rework. |
| 0.125" bleed is the standard | All live-edge content needs at least 0.125" bleed; covers always, interiors when images touch the edge. |
| Embed every font | Unembedded fonts cause RIP failure or substitution; verify in Acrobat before every upload. |
| Re-run after every change | Any page count, trim, or content change invalidates the previous preflight result. |
| Alhora reduces the loop | Alhora's built-in trim, bleed, spine, and font checks produce structurally clean exports before final Acrobat inspection. |
Table of Contents
- Why PDF preflight matters for book printing
- Essential preflight checklist for book interiors
- Essential preflight checklist for covers
- How to run preflight: tools and step-by-step workflows
- Fixing the common preflight failures you will see
- Batch preflighting and automation for series or large-volume jobs
- Final proofing and the last preflight before upload
- How Alhora fits into a preflight workflow
- Alhora makes the preflight process faster from the start
- Sources
Why PDF preflight matters for book printing
Skipping preflight does not save time. It moves the problem downstream, where fixing it costs more.
Common upload errors on KDP include trim mismatches, missing or miscalculated bleed areas, and spine width inaccuracies — all of which trigger automatic rejection. A rejected upload means a delay of hours or days, a corrected re-export, and sometimes a reorder of a physical proof. For a self-publisher on a launch deadline, that delay is a real problem. For a formatter handling ten titles a month, it compounds fast.
The subtler risk is what gets through without rejection but still prints wrong. A cover with RGB art that the printer silently converts to CMYK will shift colors. A text block that sits too close to the spine will get swallowed by binding. Neither of these triggers an error message — they just look bad in the finished book.
Production risks that preflight catches before they become print problems:
- Trim mismatch: PDF dimensions do not match the printer's trim spec; the file is rejected or scaled incorrectly
- Missing bleed: Backgrounds or images that extend to the edge print with a white sliver
- Unembedded fonts: The printer's RIP substitutes a default font or fails to process the file
- Low-resolution images: 72 PPI screen images print visibly pixelated at 300 DPI press output
- Wrong color space: RGB images converted at the press produce unpredictable color shifts
- Spine width error: A cover wrap built on the wrong spine calculation causes text to wrap around the spine edge
One concrete example: a 6" × 9" paperback uploaded to KDP with a PDF page size of 6.125" × 9.25" (a common mistake when bleed is added to the page rather than extending beyond it) will be rejected immediately. The fix takes two minutes in InDesign or Affinity Publisher — but only if you know what caused it.
Essential preflight checklist for book interiors
Interior PDFs fail for a shorter list of reasons than covers, but the failures are just as disruptive. Work through these checks in geometry-first order: dimensions, then resources, then color.
Page geometry
| Check | What to verify | Pass condition |
|---|---|---|
| Trim dimensions | PDF page size equals target trim | 6" × 9" trim = 6" × 9" PDF pages |
| Bleed (if used) | Bleed box extends 0.125" beyond trim | Required when images or backgrounds bleed to edge |
| Margins and gutter | Live text stays inside safe margin | Minimum gutter on perfect-bound books |
| Page count | Total pages match printer's requirement | Even page count for offset; POD accepts odd |
Fonts and images
Every font used in the interior must be embedded. Open the PDF in Acrobat Pro and go to File > Properties > Fonts to see the full list. Any font listed without "Embedded" or "Embedded Subset" next to it will either substitute or fail at the RIP. Subset embedding (embedding only the characters used) is fine for most print jobs; full embedding is required by some printers for editable PDFs.

Images should be 300 PPI at the final printed size. In Acrobat's Preflight tool, the "Image resolution" check reports effective PPI after scaling.
Color
For black-and-white interiors, the check is simpler: confirm no RGB or CMYK color objects appear on body pages unless intentional. For color interiors, every image and graphic should be CMYK. Spot colors in an interior are almost never intentional and should be flagged.
Pro Tip: Set your layout application's document color mode to CMYK before placing any images. Placing RGB images into a CMYK document does not convert them — Acrobat Preflight will still flag them as RGB at export.
Essential preflight checklist for covers
Cover PDFs cause more rejections than interiors, mostly because the geometry is more complex. A cover wrap is a single flat PDF containing back cover, spine, and front cover — and every dimension must be calculated from the final page count and paper stock.
Spine width calculation
Spine width is not a fixed number. It changes with page count and paper type. KDP and IngramSpark both provide spine width calculators, and KDPPreflight converts vague upload errors into specific measurements — useful when a rejection message says "spine text outside safe area" without telling you by how much.
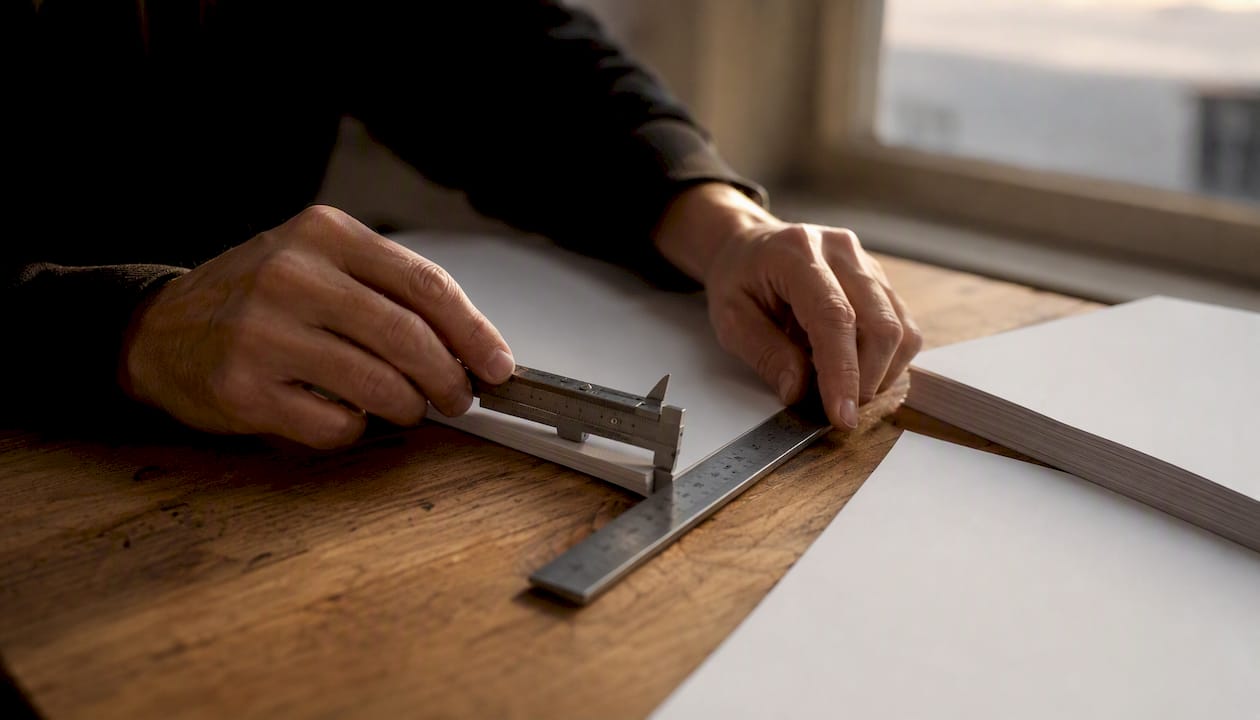
The standard formula for white interior paper on KDP is: page count × 0.002252 inches. Cream paper uses a slightly different multiplier. Build the cover at the calculated spine width, then recalculate and rebuild if the page count changes before final upload.
Cover geometry checklist
- Full-wrap PDF width = back cover width + spine width + front cover width + 0.25" total bleed (0.125" each side)
- Full-wrap PDF height = trim height + 0.25" total bleed (0.125" top and bottom)
- All live content (text, faces, logos) stays at least 0.125" inside the trim line on every edge
- Barcode and ISBN placement: bottom-right of back cover, inside the safe area, white or light background
- No spot colors unless the printer explicitly supports them; varnish and foil require a separate spot channel and printer confirmation
Bleed and safety zones
Think of the cover as three nested rectangles. The outermost is the bleed boundary — the full PDF size. The middle is the trim line — where the cutter will cut. The innermost is the safe zone — where all critical content must live. Anything between the trim line and the bleed boundary may be cut off. Anything between the trim line and the safe zone may be cut off on a bad day.
Pro Tip: After any page-count change — even adding or removing a single page — recalculate the spine width and rebuild the cover PDF from scratch. A cover built on a stale spine calculation will be rejected even if everything else is correct.
For illustrated or picture-heavy formats, the print-ready children's book guide covers bleed and artwork handling in detail for full-bleed spreads.
How to run preflight: tools and step-by-step workflows
Running Acrobat Pro's Preflight tool
Acrobat Pro's Preflight tool is the industry standard for structural PDF inspection. Here is the basic procedure:
- Open the PDF in Acrobat Pro.
- Go to Tools > Print Production > Preflight.
- In the Preflight dialog, select a profile library. For book printing, choose a PDF/X profile (PDF/X-1a for offset, PDF/X-4 for POD platforms that accept transparency).
- Click Analyze (or Analyze and fix if you want Acrobat to attempt automatic corrections).
- Review the results panel. Errors appear in red; warnings appear in yellow.
- Save the Preflight report as a PDF for QA documentation.
The report lists every flagged item with its page number and a description of the problem. Errors must be resolved before upload. Warnings require judgment — some are acceptable depending on the printer's tolerance (a warning about a CMYK value slightly outside gamut may be fine; a warning about an unembedded font is not).
Choosing the right PDF/X profile
- PDF/X-1a: All content converted to CMYK or spot, fonts embedded, no transparency. Required by many offset printers and some POD services. The safest choice for traditional print.
- PDF/X-3: Allows color-managed RGB and ICC profiles. Useful when the printer manages color conversion.
- PDF/X-4: Supports live transparency and layers. Accepted by KDP and IngramSpark for color interiors and covers.
When in doubt, ask the printer which profile they require. Most POD platforms publish their PDF requirements in their help documentation.
Batch vs. manual preflight
Manual preflight in Acrobat works well for single titles. For a series or a catalog of files, Acrobat's batch processing (under Tools > Action Wizard) can run the same Preflight profile across multiple PDFs and output a combined report. PitStop Pro, the de facto automated preflight and fix tool for professional prepress, goes further: it can apply fixups automatically (convert RGB to CMYK, embed fonts, correct bleed) across a batch without manual intervention per file.
Fixing the common preflight failures you will see
Most preflight errors fall into a short list of categories. The table below maps the error to its cause and the fix.
| Error message | Probable cause | Concrete fix |
|---|---|---|
| "Font not embedded" | Font exported without embedding | Re-export with "Embed all fonts" enabled in the PDF export dialog |
| "Image resolution below 300 PPI" | Low-res image placed at large size | Replace with 300 PPI source image or reduce placed size |
| "RGB color space detected" | Image placed as RGB, not converted | Convert image to CMYK in Photoshop before placing, or use a CMYK export preset |
| "Trim size mismatch" | PDF page size differs from printer spec | Correct document size in layout app and re-export |
| "Bleed insufficient" | Bleed set to 0 or less than 0.125" | Set bleed to 0.125" in export dialog and extend background/image to bleed boundary |
| "Spot color found" | Unintended spot color in a CMYK job | Convert spot to CMYK process in Ink Manager (Acrobat or InDesign) |
| "Transparency not flattened" | Live transparency in a PDF/X-1a job | Flatten transparency in export settings or switch to PDF/X-4 profile |
| "Page count mismatch" | Odd page count for a perfect-bound book | Add a blank page at the end or adjust front matter |
Errors vs. warnings: how to prioritize
Errors are structural failures — the file will not print correctly or will be rejected. Fix every error before upload. Warnings are advisory: they flag conditions that may cause problems depending on the printer. Check with the printer before dismissing any warning.
When a preflight report returns more than a handful of errors, escalate to the printer's prepress team before attempting fixes. Some errors (particularly those involving color profiles or transparency) interact with each other, and fixing them in the wrong order can introduce new problems.
Pro Tip: Font licensing can block embedding entirely. Some commercial fonts are flagged as "no embedding" in their license bits, which means Acrobat cannot embed them even when you try. If a font refuses to embed, check the license — you may need to purchase a print license or substitute a font that permits embedding.
Batch preflighting and automation for series or large-volume jobs
Running preflight manually on 30 titles is not a workflow — it is a bottleneck. Batch automation changes the math.
Setting up a batch preflight run
Before running a batch, standardize the inputs:
- Use consistent file naming:
[title-slug]_[version]_[interior|cover].pdf - Store all files in a single folder with no subfolders (Acrobat's Action Wizard processes flat directories)
- Confirm all files target the same trim size and printer spec — do not mix trim sizes in a single batch run
- Document the target profile (PDF/X-1a, PDF/X-4) and save it as a named Acrobat Preflight profile
Running the batch
- In Acrobat Pro, open Tools > Action Wizard > Create New Action.
- Add the Preflight step and select the saved profile.
- Set the output folder for reports.
- Run the action on the source folder.
- Review the combined output: files with errors go into a "fix" queue; clean files move to the upload queue.
For larger catalogs, PitStop Server automates this at the folder-watch level — drop a PDF into a hot folder and it runs preflight, applies fixups, and routes the file to pass or fail folders without any manual trigger.
What to re-run after changes
Re-run preflight after any of these events, even if the previous run was clean:
- Trim size or page count changes
- Font substitution or addition
- Image replacement or resolution change
- Cover rebuild after spine recalculation
- Export settings change (profile, bleed, color conversion)
The print validation guidance is clear on this: always validate the final exported PDF, not the source file or a previous export. A clean preflight on an earlier version means nothing for the file you are about to upload.
Final proofing and the last preflight before upload
The final preflight run happens on the file you are about to upload — not the file you exported yesterday.
Pre-upload checklist
- File name matches the printer's naming convention (no spaces, no special characters)
- PDF page dimensions match the target trim exactly
- Cover spine width recalculated against the final page count
- All fonts embedded (verify in Acrobat: File > Properties > Fonts)
- ICC profile embedded and matches the printer's requirement
- No RGB images in CMYK jobs (run a final color space check)
- Bleed confirmed at 0.125" on all live edges
- Preflight report saved and dated
Soft proof vs. hard proof
A soft proof is a calibrated on-screen simulation of how the file will print on a specific press or printer profile. It catches color shifts and gamut problems without printing anything. A hard proof is a physical print on the target stock — it catches everything the soft proof misses, including paper texture, ink density, and binding behavior.
Order a hard proof when: the cover uses critical color (skin tones, brand colors, photographic images), the interior has full-bleed color pages, or the book is a high-volume run where a press error would be expensive. For a standard black-and-white paperback on a POD platform, a digital soft proof through the platform's previewer is usually sufficient.
Re-run preflight after any export or content change, no matter how small. A one-word text correction that reflows a page can change the page count, which changes the spine width, which invalidates the cover.
How Alhora fits into a preflight workflow
Alhora handles the structural layer of preflight automatically during the formatting and export process, which means many of the checks above happen before you ever open Acrobat.
What Alhora automates
- Trim and bleed checks: Alhora validates that the document's page dimensions and bleed settings match the target platform (KDP, IngramSpark, Draft2Digital, and others) before export
- Gutter and margin safety: The typesetting engine enforces safe margins for bound books, preventing text from drifting into the gutter
- Spine width calculation: Built-in spine calculators update automatically when page count changes
- Font handling: Alhora's export pipeline embeds fonts in the output PDF, reducing the most common single cause of preflight failure
- Image resolution flags: The AI-assisted check layer flags low-resolution images before export, not after
- Widows, orphans, and typography: Automatic prevention of widows and orphans means the interior arrives at preflight structurally clean
- Batch series formatting: A publisher formatting 30 titles can apply consistent trim, margin, and export settings across the entire catalog in a single operation
- AI-assisted proofreading: Flags issues without altering creative content — the author keeps full control
Two concrete use cases
Single-author paperback: An author finishing a 280-page novel sets the trim to 5.5" × 8.5" in Alhora, selects KDP as the target platform, and exports. Alhora validates trim dimensions, embeds fonts, and flags a low-resolution author photo before the PDF is generated. The author replaces the image, re-exports, and uploads a clean file on the first attempt.
Publisher batching a 30-title series: A small press uses Alhora's batch formatting to apply a consistent house style across 30 backlist titles. Spine widths update automatically per title based on page count. The export queue produces 30 validated PDFs with embedded fonts and correct bleed settings. A final Acrobat Preflight run on the batch confirms the outputs before upload to IngramSpark.
Alhora reduces the rework loop, but it does not replace a final Acrobat or printer-validator check. Use Alhora to arrive at preflight with a structurally clean file, then run the final inspection to confirm nothing was missed.
Pro Tip: After exporting from Alhora, open the PDF in Acrobat and run a quick PDF/X compliance check before uploading. The combination of Alhora's built-in validation and Acrobat's structural inspection covers both the formatting layer and the press-readiness layer.
The preflight habit that actually prevents regressions
Most production errors are not caused by ignorance of the rules. They are caused by running preflight once, making a late change, and forgetting to run it again.
The habit that prevents this is simple: treat preflight as the last step of every export, not a one-time gate before launch. Keep one named "golden" export folder. Every time you re-export for any reason, the new file replaces the old one in that folder and gets a fresh preflight run before it goes anywhere. No exceptions for "minor" changes — a one-line text fix that reflows a page can change the page count, which changes the spine, which invalidates the cover PDF you already approved.
A screen preview that looks correct is not a structural guarantee. Preflight is not an aesthetic check — it is a geometry and resource check, and those two things do not show up in a PDF viewer. The discipline of running it every time, on the final export, is what separates a production workflow from a lucky streak.
Alhora makes the preflight process faster from the start
Getting to a clean preflight report is faster when the file is built right from the beginning. Alhora's typesetting and export engine handles the structural layer — trim, bleed, gutter, spine, font embedding, and platform-specific validation — so the file arrives at final preflight already clean on the dimensions and resources that cause most rejections.
For a single title, that means fewer re-export cycles and a faster path to upload. For a publisher managing a catalog, batch formatting with consistent settings across every title means the preflight queue is a confirmation step, not a triage session. Alhora's AI-assisted checks flag issues before export without touching the creative content, so authors keep control while the structural work gets done.
To evaluate whether Alhora fits your workflow, check for: export fidelity to your target platforms (KDP, IngramSpark, Draft2Digital, Apple Books, Kobo), transparent validation reporting, batch capabilities for series work, and a pricing model that matches your volume (monthly, annual, or lifetime license options are available).
Start with Alhora and export your first print-ready PDF with built-in preflight validation already done.
Sources
- KDP help: Common upload errors and how to avoid them
- Analyzing documents with the Preflight tool (Acrobat Pro)
- Print-Ready PDF Preflight Checklist for KDP and IngramSpark | Print Validation
- KDPPreflight — Free KDP Cover Checker, Bleed Checker & Trim Size Calculator