
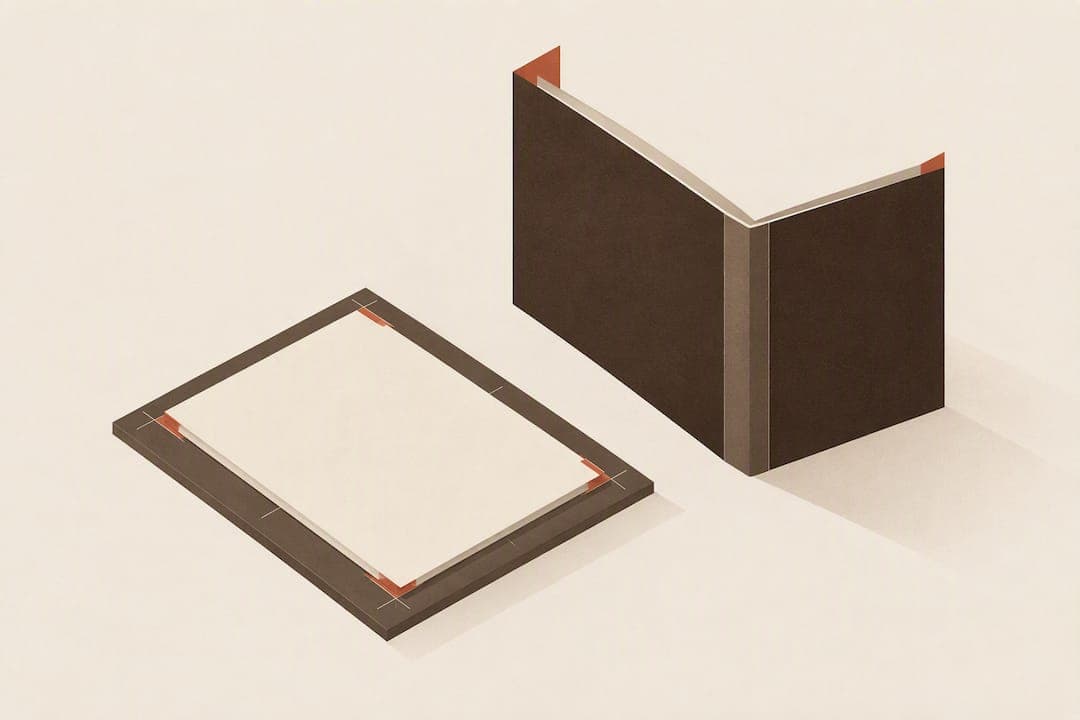
Use bleed only when artwork must reach the page edge. For KDP interiors, add 0.125" to the width and 0.25" to the height (0.125" on top plus 0.125" on bottom), so a 6"×9" trim becomes a file slightly larger to include bleed (6.125"×9.25"). Bleed files must upload as print-ready PDFs. If your manuscript is text-only, skip bleed and set the page size to your exact trim size instead.
TL;DR:
- Most books with edge-to-edge artwork, such as photo, art, or coloring books, require bleed to account for trimming shifts that could expose unprinted paper.
- The standard bleed size for KDP is 0.125 inches added to the width and 0.25 inches to the height of the trim size, with coverage extending beyond the trim line.
- Applying bleed only works if artwork extends into the bleed area; simply enabling bleed in the upload settings without extending artwork results in no actual bleed.
- Margins, especially the gutter, must be checked regularly when page count changes to prevent text from cropping into the spine during binding.
- Using formatting software with built-in preflight validation, such as Alhora, helps ensure bleed, margins, and DPI meet KDP standards before upload, reducing delays and reproofing rounds.
Table of Contents
- What Are KDP Bleed Settings and When Do You Need Them?
- KDP Interior Bleed Dimensions: The Formula and Worked Examples
- KDP Print Margins: Gutter and Outside Margin Minimums
- How to Set KDP Bleed in Word, Pages, InDesign, and Canva
- KDP Upload Requirements: Preflight Checklist Before You Export
- Quick KDP Preflight Checklist and One-Line Fixes
- Why Predictable Bleed Workflows Beat Perfect-Looking Ones
- Validate Bleed and Export KDP-Ready Files With Alhora
- Sources
- FAQ
What Are KDP Bleed Settings and When Do You Need Them?
Bleed exists because printers cannot cut with pixel-level precision. When a book gets trimmed to its final size, the blade shifts by a fraction of a millimeter from copy to copy. If your artwork ends exactly at the trim line, that tiny shift leaves a thin white sliver of unprinted paper along the edge. Extending the artwork 0.125" past the trim line gives the blade room to move without exposing that gap.
Not every book needs this. The decision comes down to one question: does anything on the page touch the physical edge of the paper?
Books that typically need bleed:
- Photo books and art books with full-page images
- Coloring books with illustrations that extend edge to edge
- Children's picture books with colored backgrounds reaching the margin
- Any interior with decorative borders, colored page backgrounds, or full-bleed chapter openers
Books that usually don't:
- Novels and short story collections with standard paragraph text
- Academic works, memoirs, and most nonfiction with body text only
- Journals or workbooks with lined pages that stop short of the edge
Bleed and trim sizes matter because KDP only supports bleed on fixed-format, print-ready PDFs, and if even one page in your interior needs it, the entire file has to be built to bleed dimensions. There's no mixing bleed and no-bleed pages within a single upload.
Pro Tip: Turning on bleed in KDP's dropdown does nothing by itself. If your artwork still stops at the old trim line, you've just added blank margin, not bled coverage. The art itself has to extend into that extra 0.125" or the fix accomplishes nothing.
KDP Interior Bleed Dimensions: The Formula and Worked Examples
The math is simple once you have it memorized: new width = trim width + 0.125", and new height = trim height + 0.25". The height gets double the width's adjustment because bleed applies to the top and bottom edges separately, while KDP interiors only bleed on the outside edge for width, not the inside spine edge.
Here's how that formula plays out across the trim sizes authors use most often.
| Trim size (inches) | Bleed PDF size (inches) | Trim size (mm) | Bleed PDF size (mm) |
|---|---|---|---|
| 5" × 8" | 5.125" × 8.25" | 127 × 203.2 | 130.2 × 209.6 |
| 5.5" × 8.5" | 5.625" × 8.75" | 139.7 × 215.9 | 142.9 × 222.3 |
| 6" × 9" | 6.125" × 9.25" | 152.4 × 228.6 | 155.6 × 235 |
| 8.5" × 11" | 8.625" × 11.25" | 215.9 × 279.4 | 219.1 × 285.8 |
That 6"×9" example is the one KDP itself uses in its bleed and trim documentation, and it's worth memorizing since it's the most common trim size for fiction and narrative nonfiction that still uses bleed for chapter art.
One distinction trips up a lot of first-time formatters: this formula is for interiors only. Covers follow an entirely different calculation, since cover bleed applies to all outer edges of the full spread, not just top, bottom, and outside. A cover's total height is trim height plus 0.25", but the width calculation folds in the spine width and wraps bleed around the entire front, spine, and back panel as one continuous piece. Never plug interior numbers into a cover template, and never assume your cover designer's bleed setup applies to your interior file.
KDP Print Margins: Gutter and Outside Margin Minimums
Margins on a printed book aren't arbitrary white space. The inside margin, called the gutter, has to account for how much of the page disappears into the spine once the book is bound. A 40-page pamphlet loses almost nothing to the spine curve. An 800-page novel loses enough that text set too close to the inside edge becomes unreadable without cracking the spine flat.
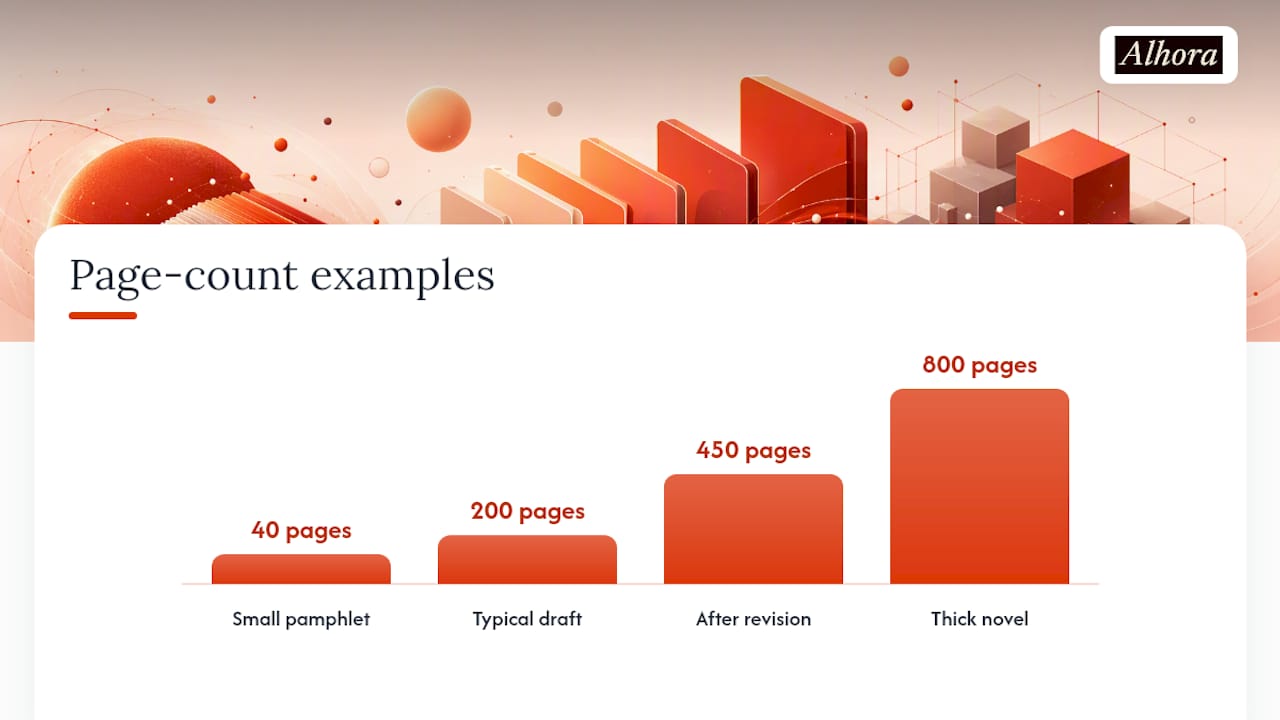
KDP scales its gutter minimum directly with page count, and the outside margin minimum depends on whether you've selected bleed:
These figures come straight from KDP's trim, bleed, and margin guidelines, and the scaling logic matters more than it looks: the gutter has to grow because binding depth adds up. If you set your interior margins once for a 200-page draft and then add another 150 pages during revision, your gutter minimum jumps a full margin band. Text that was safely inside the margin at 300 pages can shift toward the spine at 450 and start getting visually cropped in the fold.
A few practical habits keep you out of trouble here:
- Recheck your margins any time your page count crosses one of the bands above, not just at final export.
- Keep body text at least 0.5" from the trim edge even when the KDP minimum is lower. Genre readers notice cramped margins faster than almost any other formatting flaw.
- Push page numbers and running headers slightly inside the safe area rather than right at the margin minimum. They're the first thing that gets clipped if your trim shifts during printing.
- For image-heavy layouts, keep any text sitting on top of a full-bleed image well inside the safe zone. The bleed edge is for background art, not for anything a reader needs to read.
If you want the full breakdown of how gutter sizing interacts with genre conventions and page count, Alhora's guide on KDP margin requirements walks through it in more depth than the KDP help pages alone.
How to Set KDP Bleed in Word, Pages, InDesign, and Canva
Every layout app handles bleed differently, and most of the upload failures authors run into trace back to a mismatch between what the app calls "bleed" and what KDP's previewer actually expects.
- Microsoft Word. Word has no native bleed setting. Set your page size under Layout to the full bleed dimensions (6.125" × 9.25" for a 6"×9" bleed book, not the trim size), then manually extend any full-page images or backgrounds to fill that larger canvas. Export as PDF using "Save As" rather than a print-to-PDF driver, since some printer drivers add their own margins. Word interiors with tables, footnotes, or bleeding images generally shouldn't route through Kindle Create, which KDP doesn't support for that kind of layout.
- Pages (Mac). Go to Document Setup, choose Page Setup, and use "Manage Custom Sizes" to define your bleed dimensions directly rather than relying on the standard trim presets. If your book uses facing pages, enable that option before you set margins, since inside and outside margins need to be set independently once facing pages is on.
- InDesign or Affinity Publisher. These give you a true document bleed field. Set it to 0.125" in your document setup, and when you export to PDF, check "Use Document Bleed Settings" in the export dialog rather than manually typing bleed values a second time. Embed all fonts and flatten transparency effects before export, since unflattened layers are a common cause of PDF corruption on upload.
- Canva and other browser-based tools. These are the riskiest for bleed work because many add their own crop marks or extra padding automatically, which can quietly change your file's actual page size. Always download the PDF and check its dimensions against your target bleed size before uploading, and strip any visible crop marks, since they can alter the file's MediaBox in ways KDP's previewer flags immediately.
Pro Tip: If a single spread in a 300-page manuscript needs a full-bleed image, you still have to export all 300 pages at bleed dimensions. There's no partial-bleed upload option, so decide early whether that one spread is worth reformatting the entire interior.
Whatever app you use, recheck your final page count and margins after any resize. Bleed changes your effective page dimensions, and margins calculated against the trim size don't automatically update when the canvas grows.
KDP Upload Requirements: Preflight Checklist Before You Export
Most rejected uploads fail for the same handful of reasons, and nearly all of them are catchable before you ever open the KDP dashboard. A working preflight habit checks page dimensions, crop marks, fonts, and image resolution every single time, not just on the first submission.
Run through this before every upload:
- Confirm the PDF's actual page size matches your intended bleed or trim dimensions exactly, not an approximation.
- Strip any crop marks or printer marks the export process added automatically.
- Embed every font used in the document; unembedded fonts are one of the most common silent failure points.
- Check that all images sit at 300 DPI or higher at their final printed size, not just at their original resolution.
- Flatten any transparency effects or layered elements before export.
- Verify there's no unexpected white border around a full-bleed cover.
- Double-check that your KDP bleed selection in the dashboard matches how the file was actually built.
Beyond the file itself, KDP's Print Previewer checks specific PDF metadata boxes: the MediaBox (overall page size), the TrimBox (final cut line), and the BleedBox (the extended bleed area). In Adobe Acrobat, you can view these under Document Properties, and in Preview on a Mac, the file's inspector panel shows the page dimensions directly. If crop marks or export settings shifted the MediaBox away from your intended bleed size, KDP's previewer will reject the file with an Export Protocol Error or flag a margin mismatch that has nothing to do with your actual layout.
A reliable preflight pass, meaning one that actually checks PDF box dimensions and image DPI rather than eyeballing the layout, catches the overwhelming majority of the upload failures authors report running into after export. The fix is almost always in the export settings, not the manuscript itself.
Quick KDP Preflight Checklist and One-Line Fixes
Keep this list next to your export button. It covers the checks that catch nearly every recurring KDP upload problem.
- Page dimensions match your bleed or trim target exactly.
- Bleed selection in KDP matches how the file was built.
- No visible or hidden crop marks in the exported PDF.
- All images at 300 DPI or higher at final size.
- All fonts embedded, not just referenced.
- Trim size and interior bleed setting match on the KDP dashboard.
- A printed proof ordered before wide release, especially for image-heavy interiors.
PDF wrong size: re-export directly from your layout app rather than re-saving through a PDF printer driver. Previewer margin error with no visible layout problem: check for crop marks or extra padding added during export. Low-resolution image warning: replace the asset at a higher resolution rather than resizing the existing file upward. Missing font error: re-export with font embedding explicitly enabled.
If your interior has full-bleed images, colored backgrounds, or anything hand-drawn, order a physical proof before your launch date. The previewer catches file structure problems, but not color shifts or trim placement the way holding the actual printed book does.
Why Predictable Bleed Workflows Beat Perfect-Looking Ones
Bleed isn't a default setting to reach for because it looks more professional. It's a technical fix for one specific problem: art that touches the trim edge. Every bleed page you don't need adds margin math, export risk, and proof rounds you didn't have to run.
The real efficiency gain comes from catching bleed, margin, and DPI mismatches before export, not after a rejected upload. That's the entire value of running a validation pass with something like Alhora instead of guessing your way through Acrobat's box inspector. Fewer proof rounds mean a faster path to a finished book.
— James
Validate Bleed and Export KDP-Ready Files With Alhora
Getting bleed, margins, and DPI right on the first export saves you the proof-and-reupload cycle that eats weeks out of a launch timeline. Book formatting software can run real-time validation against KDP's own trim, bleed, and margin standards while you're still formatting, not after you've already uploaded a file and waited for the previewer to flag a problem.
The workflow is straightforward: import your manuscript, run Alhora's one-click preflight check, fix whatever it flags (wrong bleed dimensions, margins under the gutter minimum, images under 300 DPI), then export a print-ready PDF sized exactly to your trim and bleed requirements. Such formatting software often works on Mac, Windows, Linux, and ChromeOS, so formatting doesn't depend on which machine you're using that day. Authors coming from a Word draft can import it directly and let Alhora handle the page-size conversion Word can't do natively. If you're ready to stop guessing at box dimensions in Acrobat, start with Alhora's book formatting software and run your interior through a KDP preflight before your next upload.
FAQ
What Is the Standard Bleed Margin for KDP Books?
KDP requires adding 0.125" to the width and 0.125" to both the top and bottom of your trim size, for a total height increase of 0.25". A 6"×9" trim becomes a 6.125"×9.25" PDF when bleed is selected.
What's the Difference Between Bleed and No Bleed on KDP?
Bleed extends artwork past the trim line so nothing white shows after cutting, and it requires the larger PDF dimensions described above plus a print-ready PDF upload. No bleed keeps your file at the exact trim size, since no artwork touches the edge, which simplifies both formatting and margin calculations.
Do KDP Coloring Books Need Bleed?
Most coloring books need bleed because their illustrations typically extend to the edge of the page, so the file should be built at the bleed dimensions for the trim size you chose. If your coloring book design leaves a clean border around every illustration, no bleed is necessary and you can keep the file at trim size.
Is Self-Publishing Through KDP Worth It?
KDP remains one of the most accessible print and ebook distribution channels for independent authors, largely because there's no upfront printing cost with its print-on-demand model. Whether it's worth it for a given author depends more on genre positioning and formatting quality than on the platform itself, and getting bleed, margins, and trim size right the first time is one of the biggest factors in avoiding delays before launch.