
Add bleed and crop marks any time artwork touches the edge of the page. Extend backgrounds and images at least 3mm past the trim line, keep text and logos 3–5mm inside it, and export the PDF with crop marks turned on and offset outside the bleed.
The rule of thumb: 3mm (0.125") on all sides for most commercial work, 5mm for large-format or thick-stock jobs, and 0.125"/3.2mm specifically for Amazon KDP paperback covers. Before you touch a single export setting, run two checks:
- Does every background, photo, or color block that meets the page edge extend fully into the bleed, with nothing floating short of it?
- Is every piece of text, every logo, every page number sitting inside the safe zone, not just inside the trim line?
Confirm your printer's exact specs before final export. "Standard" bleed varies slightly by shop, and a five-minute email saves a reprint.
Key Takeaways
Getting bleed and trim marks right comes down to extending artwork past the trim line, keeping content inside the safe zone, and exporting marks that sit outside the bleed, not inside it.
| Point | Details |
|---|---|
| Default bleed size | Use 3mm (0.125") on all sides for most commercial print jobs. |
| Know the exceptions | Large-format and die-cut jobs often need 5mm to a quarter inch of bleed. |
| Respect the safe zone | Keep text, logos, and page numbers 3–5mm inside the trim line. |
| Export marks correctly | Check "Use Document Bleed Settings" and "Crop Marks" (InDesign/Illustrator) before exporting to PDF. |
| KDP has its own rule | Amazon KDP paperbacks need exactly 0.125" (3.2mm) of bleed and a clean interior file with no crop marks. |
| Automate book-specific checks | Alhora runs trim, bleed, and gutter validation automatically when formatting manuscripts for KDP and other platforms. |
Table of Contents
- What Bleed and Trim Marks Actually Mean
- Why Printers Actually Need This Stuff
- Standard Bleed Sizes and Safe Zones to Use
- How to Set Bleed and Add Crop Marks in Every Major App
- Preflight Checklist Before You Send Files to Print
- KDP and Book-Specific Bleed Rules You Can't Skip
- Common Bleed Mistakes and How to Fix Them Fast
- Alhora Handles the Formatting So You Handle the Design
- Sources
What Bleed and Trim Marks Actually Mean
Four terms get thrown around loosely on job sheets and briefs, and mixing them up is how files get rejected. Here's what each one actually refers to.
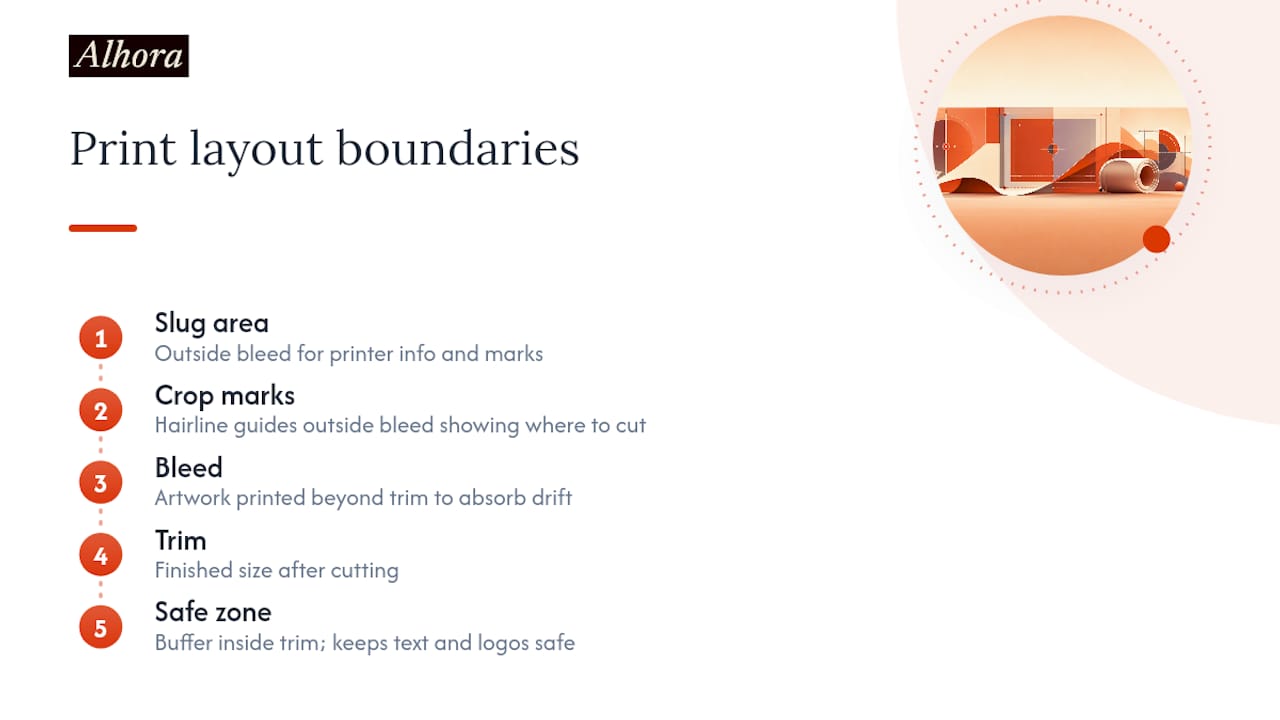
Bleed is the part of your artwork that extends past the finished page size, printed on purpose so it can be sliced off. When a background color or photo needs to reach the physical edge of a flyer, business card, or book cover, you can't just make it end exactly at the trim line. Paper shifts slightly every time a blade or guillotine passes through a stack, and even a fraction of a millimeter of drift exposes raw paper white. Bleed exists specifically to absorb that drift: the artwork is printed larger than the final piece and then cut down to size.
Trim (sometimes called the trim line, or TrimBox in a PDF's internal structure) is the finished size of the piece after cutting. It's the box that defines what the reader actually holds. Everything outside it, by definition, gets removed.
Crop marks, also called trim marks, are the thin hairline guides printed at the corners of a sheet to show the operator exactly where to cut. They live outside the bleed area entirely; a mark that overlaps the bleed defeats its own purpose, since the cutting blade needs a clean reference point with no ink competing for attention. Crop marks and bleed work as a pair: the bleed gives cutting tolerance, the marks tell the cutter where the tolerance ends.
Slug is the area outside the bleed reserved for information the printer needs but the reader never sees: job names, color bars, registration marks, date stamps. Registration marks and color bars in the slug area help the press operator align plates and check ink density, and everything in the slug gets trimmed away along with the bleed.
The safe zone (also called the safety margin) is the inverse of bleed: a buffer inside the trim line where nothing critical should sit. Typical safe-zone distance runs 3–5mm inward from the trim, and it exists because trimming tolerance cuts both ways. A cut that drifts outward eats into your bleed harmlessly. A cut that drifts inward can clip text or a logo if you've placed it too close to the edge.
In a PDF's page geometry, these translate to specific boxes: the TrimBox marks the finished size, the BleedBox marks the extended bleed area, and crop marks are typically drawn based on an offset value you set at export, not stored as a named box at all.
Why Printers Actually Need This Stuff
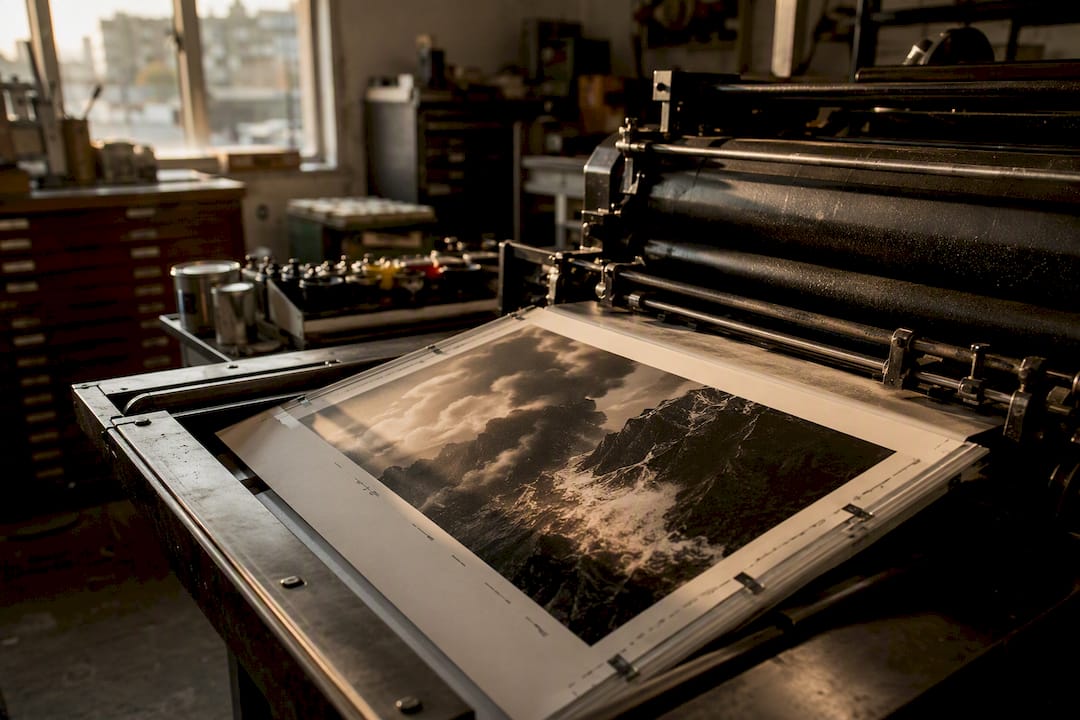
Guillotine cutters and stack cutters don't slice a single sheet at a time. They cut through stacks, sometimes hundreds of sheets deep, and paper in a stack shifts. Humidity changes the paper's dimensions slightly. The stack itself can bow. None of this is sloppy work; it's physics acting on a material that isn't perfectly rigid.
Without bleed, that shift shows up as a thin white sliver along one or more edges of the finished piece, and it's the single most common reason a print job looks amateurish next to one that isn't. With bleed in place, the cut can land a hair off and the reader never sees it, because the artwork was never designed to end exactly at the blade.
Crop marks solve a related but separate problem: precision of placement, not tolerance for drift. They give the operator (human or automated) an exact visual reference for where the trim line falls, independent of where the bleed happens to end. Skip them, and a print shop either has to guess based on the document's own page size (risky if bleed is baked in) or send the file back and ask you to add them.
The failure modes are predictable:
- No bleed: visible white edges, or a shop rejecting the file outright and asking for a corrected version.
- No crop marks: the shop either estimates trim placement or bounces the file back, adding a day or more to turnaround.
- Marks placed inside the bleed: the cutting reference gets contaminated by artwork, forcing a manual fix on the print side.
Pro Tip: Every printer's "standard" bleed is a convention, not a law. Confirm the exact bleed size, crop mark offset, and file format your specific printer wants before final export; a two-line email costs you nothing and prevents a reprint that costs you a client.
Standard Bleed Sizes and Safe Zones to Use
Three millimeters, roughly 0.125 inches, is the number you'll use on the overwhelming majority of commercial print jobs: business cards, flyers, brochures, posters, standard book covers. It's become close to a universal default because it comfortably absorbs the drift most guillotine and digital cutters produce, without wasting so much canvas that it slows you down in layout.
That default has real exceptions, though:
- Large-format prints (banners, posters over roughly A2, signage) often call for 5mm bleed, since bigger sheets and heavier substrates shift more during handling and cutting.
- Die-cut jobs (shaped labels, folders, packaging) sometimes need up to a quarter inch of bleed) because die-cutting introduces more positional variance than a straight guillotine cut.
- Thick stock and multi-section books may need extra allowance on top of the standard figure, particularly on the spine side, for reasons covered in the KDP section below.
- Amazon KDP paperback covers require exactly 0.125 inches (3.2mm) of bleed on the edges KDP specifies, a figure close enough to the general 3mm standard to confuse people, but treated as its own fixed requirement rather than a rounding of the general rule.
3mm is the print industry's default bleed. It's what most commercial printers expect without being asked, but KDP's own spec calls for 0.125 inches, or 3.2mm, on paperback covers and bleed-dependent interior pages. That's a real, if small, difference worth double-checking before you export.
Safe zone follows a parallel logic: keep essential content 3–5mm inside the trim line as standard practice. Printed.com recommends 3mm bleed paired with a 5mm safe zone for anything a reader needs to actually read, on the reasoning that trimming tolerance can eat inward as easily as it eats outward. Books with heavy interior margins or high page counts sometimes need a wider safe zone still, which the KDP section below covers in more detail.
One more measurement worth nailing down: the offset of your crop marks from the trim line. This is the gap between where the mark sits and the trim edge itself, and it needs enough room that the mark clears the bleed area entirely. Set the offset too small and a mark can print inside the bleed zone, which is the exact overlap problem crop marks exist to avoid.
How to Set Bleed and Add Crop Marks in Every Major App
Here's where the actual production work happens. Each app handles bleed and marks a little differently, and the settings that trip people up are almost always the same one or two checkboxes.
Adobe InDesign
- Open the New Document dialog (or Document Setup if the file already exists) and click "More Options" to reveal the Bleed and Slug fields.
- Enter your bleed value, typically 3mm or 0.125", on all four sides. Uncheck the link icon first if you need different values per side.
- Design with the red bleed guide as your extension line: any background or image meant to reach the page edge needs to reach that guide, not just the black trim edge.
- When exporting to PDF, go to the Marks and Bleeds panel in the Export dialog.
- Check "Crop Marks" under Marks, and set the offset set to a small default value that works for most jobs, but confirm against your printer's spec.
- Under Bleed and Slug, check "Use Document Bleed Settings" so InDesign pulls the bleed values you set in step 2 rather than defaulting to zero.
The single most common InDesign export mistake: forgetting to check "Use Document Bleed Settings." Skip it, and InDesign exports the file with no bleed at all, regardless of what you set up in the document itself.
Adobe Illustrator
- In the New Document dialog, expand "Advanced Options" and set your bleed value in the Bleed field.
- Build your artboard with the bleed guide visible; extend full-bleed elements to that guide.
- Export as PDF (File > Save As, choose Adobe PDF).
- In the Save Adobe PDF dialog, go to the Marks and Bleeds tab.
- Check "Trim Marks," then check "Use Document Bleed Settings" to carry your artboard's bleed into the export.
Illustrator's version of the same trap: if you skip setting bleed at the document level and only extend artwork visually past the artboard, "Use Document Bleed Settings" has nothing to pull from, and your export reverts to a zero bleed.
Adobe Photoshop
Photoshop handles bleed differently because it has no native concept of crop marks at export. If you're building a flat, single-layer design (a poster, a photo print), set your canvas size to include the bleed from the start: for a 3mm bleed on a 210mm × 297mm page, build a 216mm × 303mm canvas and extend backgrounds fully to those edges.
Photoshop won't add crop marks to a PDF on its own. Two options: place the finished Photoshop file into InDesign or Illustrator and export marks from there, or add marks manually as a separate vector layer before flattening to PDF. For anything client-facing or bound for a professional printer, the first option is faster and more reliable.
Adobe Acrobat
Acrobat rarely creates bleed and crop marks from scratch; it's usually where you verify or adjust marks that were already added upstream, or where imposition software adds them during layout for print. Acrobat Pro's Print Production tools let you inspect a PDF's TrimBox and BleedBox values directly and flatten transparency effects that might otherwise render incorrectly on a RIP.
Two things worth checking in Acrobat before sending a file onward: confirm transparency is flattened if your printer's workflow requires it, and confirm fonts are embedded, not just referenced. A font that isn't embedded can substitute silently on another machine and shift your entire layout without warning.
Canva
- Build your design at the correct print dimensions.
- Go to Share > Download.
- Choose "PDF Print" as the file type.
- Check the box for "Crop marks and bleed."
- Before downloading, zoom in on every edge of your design and confirm background elements actually extend to where the bleed line will fall. Canva adds the bleed space automatically, but it does not automatically extend your artwork into it.
Canva's bleed and crop mark export is more basic than InDesign or Illustrator's, and it's worth a manual zoom-and-check pass every time, since there's no separate bleed guide layer to design against the way there is in the Adobe apps.
Pro Tip: If you inherit a file with no bleed and re-extending every image by hand isn't practical, a scale trick can save the job: enlarging the page to roughly 101% in a PDF tool, or adjusting the BleedBox directly in prepress software, often creates a usable bleed area without touching the original artwork.
Preflight Checklist Before You Send Files to Print
Run this sequence every time, in order, before a file leaves your hands:
- Confirm the printer's exact bleed and crop mark requirements. Don't assume 3mm; ask, especially for large-format, die-cut, or unusual stock jobs.
- Set color mode to CMYK. RGB files sent to a commercial press shift color unpredictably on output.
- Check image resolution at 300 DPI at final print size, not at whatever size the image happened to be placed.
- Embed or outline all fonts. A missing font substitution is invisible until the printed piece comes back wrong.
- Verify the BleedBox and TrimBox are both present and correct in the exported PDF, not just visually correct on screen.
- Flatten transparency effects if your printer's RIP or workflow requires it; ask if you're not sure.
- Strip out unnecessary layers, sticky notes, and hidden artwork that could confuse a RIP or bloat file size.
- Remove crop marks if your printer specifically asks for a clean file. This one catches people off guard, and it applies directly to book interiors uploaded to Amazon KDP: KDP wants a clean interior PDF with no crop marks, registration marks, or printer's marks of any kind, since KDP's own systems calculate trim and bleed internally.
Pro Tip: Save a version-stamped copy of every file before you export the final PDF, and put your bleed and mark offsets in writing to the printer, even if you already discussed them by phone. A saved reference file and a written spec both save you when a job needs a reprint six months later and nobody remembers the exact settings used.
KDP and Book-Specific Bleed Rules You Can't Skip
Book production has its own bleed math, and it trips up designers who are used to flyers and posters far more often than it should.
For Amazon KDP paperbacks that require bleed, the fix isn't adding a bleed setting to an existing page size; it's enlarging the PDF page itself. KDP's formula adds 0.125 inches (3.2mm) to the top, bottom, and outer edge of the page, leaving the spine-side edge untouched since that side gets bound, not trimmed. A standard 6" × 9" trim size requires a slightly larger final PDF once bleed is factored in.
Interior margins follow their own minimums, and they shift with page count: books with more pages need wider inside margins to keep text readable once the spine curve eats into the visible page. KDP's own specifications lay out exact minimums per page-count bracket, and those numbers apply whether or not the interior uses bleed at all.
Then there's creep, sometimes called shingling, a problem specific to bound books that flyer and poster work never encounters. In thicker books or those bound with sewn or perfect-bound methods, the inner pages of a signature get pushed outward relative to the outer pages as the block of paper wraps around the spine. Left uncorrected, this shifts content on inner pages closer to the gutter edge than intended. Confirm with your printer or KDP's own guidance whether your page count and binding method need creep compensation before finalizing your gutter margins.
Before uploading anything, calculate your final PDF size using KDP's own formula for your specific trim size, then run the file through KDP's online previewer. It catches margin and bleed problems that look fine in your design app but read differently once KDP's systems process the file. A tool built around book formatting, like Alhora, can run these trim, bleed, and gutter checks automatically as part of preparing a manuscript for export, which removes a lot of the manual measuring this section just walked through.
Common Bleed Mistakes and How to Fix Them Fast
The mistakes that show up over and over in print files aren't exotic. They're the same three or four, repeated by beginners and experienced designers alike when they're rushing a deadline.
Placing text or a logo too close to the trim line tops the list. The fix is mechanical: nudge anything critical at least 3–5mm inward from the trim, every time, without exception, even when a layout "feels" tighter than you'd like.
Forgetting to extend a raster background all the way into the bleed is the second most common failure, usually because the designer resized a placed image without checking whether it still covered the new canvas edge. Zoom into every corner before export. It takes fifteen seconds and it catches the problem before a print shop does.
The third: exporting a PDF with bleed set correctly in the document but forgetting the "Use Document Bleed Settings" checkbox at export time. I've seen this one waste an entire afternoon on a job that was otherwise perfect, because the fix required a full re-export and a new proof cycle.
Keep a production checklist template in your app's templates folder, and name your export files with a version number and the word "PRINT" in the filename. It sounds trivial. It's saved more jobs than any single design skill.
Alhora Handles the Formatting So You Handle the Design
If you format book interiors and covers regularly, you already know the bleed and margin math above isn't a one-time calculation. It changes with trim size, page count, and binding method every single project. Alhora is built specifically for that repetition: instead of recalculating KDP's bleed formula and creep allowances by hand for every manuscript, its typesetting engine handles trim, bleed, and gutter checks automatically as part of exporting your book across platforms including KDP, IngramSpark, Apple Books, and Kobo.
That matters most for authors and formatters juggling multiple trim sizes or a series with several books in flight, where a single missed margin adjustment on one title can mean a rejected upload or a reprint order. Alhora's AI-assisted checks flag those issues without touching your actual text, so you keep full creative control while catching the production details that cost time when a print vendor or KDP bounces a file back. If you're prepping a manuscript for print or ebook release, start formatting your book with Alhora and run your first export before your next submission deadline.
Sources
These are the core production sources behind the rules and figures in this guide, useful if you want vendor-specific detail beyond what's covered here:
- KDP help topic: Set trim size, bleed, and margins
- Set printer's marks — Adobe HelpX (InDesign)
- Bleed basics — Prepressure
- Crop marks and bleed explained — Soapbox Digital
Check the current help documentation for your specific app version, since export dialog layouts shift between releases.